Herb Garden Markers

The last part of our house left untouched was our backyard. It was seriously rough. Like, we had a jungle threatening to swallow our house.

See?
P1013566

We’ve been slowly slowly slowly ripping out all this stuff. I’m sure the same person who picked out the monkey wallpaper and painted the jungle mural on the wall designed this backyard landscaping. I eventually want to rip out everything and put in fruit trees and a cutting garden.

So far I’ve managed to rip out an enormous bush of spiky leaves that are ubiquitous around here. I don’t know exactly what kind of plant it is, but I hated it. The spot it left behind is just outside my kitchen door and the exact right size and spot for a kitchen herb garden. I found almost all of my favorite herbs at a nearby garden center (I still haven’t managed to find Bay) and set the whole thing up a few weeks ago. I’ve been thrilled with the results. I’ve been using the herbs in every meal I make, and everything is taking off like gangbusters. I had an early setback where I nearly killed my dill plant, but he started recovering once I figured out that I had planted him directly over the gas line and apparently plants don’t like that so much.

All that was left for my dream come true was some spiffy little herb markers so I could tell the difference between the cilantro and the parsley. Since it had to be weatherproof, I pulled out the polymer clay.

I just rolled out some rectangles big enough for the name of each herb, and used my new Martha Stewart stamps to create the names. I knew I wanted to use armature wire to poke them into the ground, so I pressed the wire up against the edge of the clay to make a little trough. Because I wanted to make them extra fancy, I dusted them with some pearly powders and then tossed them in the oven.

When the clay was baked and cool I took some acrylic paint and rubbed it into the letters, rinsing off any excess.
048

My initial plan was to glue the wire into the trough I made, but I soon discovered that wasn’t going to work. By the time I finished handling the clay my troughs were no longer perfect enough for the wire to fit snugly down inside it. Instead I used the troughs as a guide to bend the wire around and just let the tension hold it in place. That turned out to be all the adhesion it needed.

001

I didn’t worry too much about centering the tiles inside the wire. I wanted them to be a little off center so it would look more graphically interesting, and the clay is so light weight that there was no problem supporting it that way. Then I just poked the wires in the ground next to the right plant, and now I have my perfect herb garden.

004

Now I just need to work on eeeehhhhverything else.

Super Nephew

My cute little nephew Micah turned five back in May, and because Atti had *just* come home from the hospital and was still on oxygen, I missed his big birthday shindig. I also had no time to make him anything, and I’m committed to giving handmade gifts whenever I can manage it. Particularly to little kids who are so saturated with plastic cartoon toys.

Micah has such an imagination. I could sit forever and listen to the stories he makes up for his plastic knights to enact. I wanted to make him something that would use that crazy brain of his and allow him to become part of the action.

037
This superhero cape took me about 30 minutes to whip up. The fabric is some kind of a polyester jersey, so I didn’t even try to hem anything. I started by sewing the big white circle in the middle, using a huge piece of tissue paper behind the jersey to stabilize it and stop it from stretching. I used fleece I had lying around so once again I didn’t have to think about hemming anything. I printed out a giant M on the computer and cut that out of the blue fabric, and then stuck it in place with fusible web. Then I just sewed a quick casing at the top, and used the rest of the blue fabric to make up a tie. Just so I could continue my trend of no hemming, I outlined the M in puffy fabric paint to cover up the raw edges.

I made the tie fairly long since I wanted him to be able to use the cape for awhile, but I also didn’t want him to be able to pull the tie out as he was playing, so I sewed through the casing in the middle of the cape. Then he can still gather the cape while it’s too big for him, but it won’t come out no matter how hard he plays.

041

After I gave it to him he refused to take it off even as we went shopping at Target. I got such a thrill out of seeing this mini superhero wander around the store. I kept trying to snap a picture, but he was too fast for me.

I thought the whole thing was so cute, I had to make one for my little superguy too.
020 - Copy
I think he’s still got some growing to do.

*
*
*
*
*
*
OR DOES HE…..
029 - Copy

Recover a lampshade

As I showed off in my house tour, my dining room fixtures look like this now:
P1013605

They started as the same drop pendants, but with a thin marigold colored glass shade. The shade was so small that the fixtures disappeared in the room, and once I painted everything, the marigold color was just awful.

I bought two plain jane lampshades at Home Depot on clearance. Because the shades needed to hang from the ceiling, I needed shades with hardware conducive to that. Then I found this great fabric at a quilt store that had nearly every color I was working with. With all my materials, the rest was just a case of reverse engineering.

P1013602
Since mine was track lighting, I had to completely dismantle the fixture so I could thread the shade on. I just made a note to myself which wire went with which wire, and it was way easier than you’d think.

Here’s how the lampshades started:
P1013591

Then I just started peeling it apart. I took off the bias tape around the top and bottom and took note of these little ribbons covering the hardware.
P1013594

When I had gotten the entire shade off, I used it as my pattern and cut out the new fabric around it. Then I sewed the new fabric together in the same way the old one was. I stretched the new fabric around the outside, and then put the lining on the inside. I just started gluing as I went, bringing the edge of the lining around to the front and gluing in place. I made sure to use those little ribbons again so everything looked nice and tidy and covered up.
P1013599

Now to cover up the last of the mess. I made bias tape out of the same fabric (although I didn’t bother cutting it on the bias. I know there’s a name for this tape, but I can’t think of it.) by cutting a long strip two inches wide, folding each edge to meet in the middle and ironing (so now it’s 1″ wide) and then ironing the strip in half. (to make a 1/2″ strip with all raw edges tucked away inside.) I just glued that into place with Fabric Glue and they were finished.

One tip: if you use these shades as drop pendants, I’d recommend using a large washer in between the bulb and the shade. The big washer will hold the weight of the shade level better than a lightbulb on it’s own would.

Also: you don’t need to be too concerned about fire safety as long as you use the right bulb. Just don’t try to use a huge lightbulb in a small space and your makeover should work out just fine.

Micah’s Dragonskin Bag

Last Christmas Atticus was included (in utero) in Bear’s immediate family’s gift exchange. He got some crazy cute clothes “from” his little cousin Kai (including the tiniest velor tracksuit ever made), and as a fetus he was responsible for his cousin Micah’s present.

Micah is really into his “guys.” He collects all kinds of action figures and spends hour after hour making up elaborate scenarios for them to enact. When you sit and play with him he scripts your every move, telling you exactly what you should say and what your guy should do. He’s so the oldest kid.

This past Christmas he was really into knights and dragons. Michaels was carrying a line of action figures that featured ornate and colorful dragons along with the knights on horseback ready to defeat them. Between his parents and grandparents, he was getting the entire set.

Since these were a little more expensive than the average toy, Bear’s dad Mike really wanted Micah to understand that these were special. He suggested that I make some fancy little bag to carry all his precious guys around in.

071

I happened to have this fabric in my stash. It’s like a flannel with some kind of a plastic treatment over it creating a snakeskin effect. When I first saw the gray fabric I immediately thought of a knight’s tunic, but I thought a simple bag by itself wouldn’t be special enough, so I added the gold lame. I actually intended to create a simple piping but failed miserably. Instead I ended up creating these gold ridges that transformed the bag into a dragon. My favorite kind of mistake. I made a simple casing, leaving both sides open to make a drawstring, and threaded through some leftover bias tape. I’ve become completely enamored with fusible web, so I ironed on the monogram and fleur de lis. I love to personalize gifts for kids. I think every kid loves to see their name on stuff.

This was one of the most successful gifts I’ve ever given. He immediately stuffed his guys inside it and insisted on taking it out to the extended family Christmas party. I got the biggest kick out of listening to him tell all his cousins about his “dragonskin bag.”

Even now, nearly eight months later, it still merits his attention. I asked his mom Mari to bring it with her to the house so I could take the pictures I forgot to take and he would barely let it out of his sight. I didn’t get the greatest pictures out of it, but I don’t mind. I’d much rather see him love it too much to let me.

079

Worlds Most Basic Quilted Coasters

One of the biggest adjustments for me in moving into this house was going from nasty crappy apartment carpeting to hardwood floors. There are so many things about having no carpeting that is just fantastic – especially to someone with OCD and three long-haired cats. I geek out on a regular basis about just how pretty the floors look, especially up against such vibrant paint colors.

They have proven a bear to keep clean though. I always thought it was a simple sweep and mop on a regular basis, but that never seemed to cut it. Even after we finished the majority of the construction and I was finally able to scrub the floors, it never lasted. We walked around with black gritty feet for the first six months we lived here. I used to go stand in the shower at least three times a day just to wash off my feet. I bought three different brooms and four different mopping solutions, and the problem was always the same. The floors looked gorgeous for a couple of hours, and then the first time anything touched it – a foot, a sweaty can of Coke, a kitty paw – a mark was left and all my work was ruined.

I finally found the solution after asking around, and this was recommended by some wood floor installer guys. It’s fantastic.

Before I found my long-term solution, I kept trying to find ways to make the life of my clean floors last a little longer, and since I never successfully managed to keep the cats from walking across whatever I just mopped, the best short-term solution was to use coasters to keep anything I could from touching the ground.

Here’s my little simple tutorial for you. If you’ve ever sewn at all these will probably be intuitive, but if you haven’t, this is a great place to start.

1. Cut your fabric pieces to size. You’ll need one square cut to 3″x3″ for the center, one square cut to 4″x4″ for the back, two short sides cut to 1″x3″, and two long sides cut to 1″x4″, along with some kind of batting cut to 3″x3″.

P7312303
2. Sew the sides to the center piece. Start by sewing the short side pieces to the center piece across from each other and press open. Then sew the long pieces to the other two sides and press open.

P7312305
3. After you’ve pressed the front, lay the front of the coaster onto the back of the coaster, right sides together, and sew all the way around, leaving an inch or so open at the bottom.

P7312316
4. Turn the coaster right side out through the hole you’ve left behind, and press. Stuff with your batting.

P7272296
5. Sew around the outside of the coaster with a cute topstitch to close up your hole and to keep your batting in place. I also used a tiny stitch width to do an easy machine quilt around the flower pattern.

If you have a great memory, you might recognize these fabrics as left overs from an apron I made. The teal cotton was so heavy that it was impossible to get a crisp edge. If I had used a quilters weight cotton I probably could’ve made it look much less homesewn, but I was going for using up stash. For the stuffing I just used some fleece I had left over – again, using up stash. These coasters are not only ridiculously simple, but you can toss them right in the washing machine when they get nasty.

Inspiration Wall

Ever since Christmas my nesting has hit hyperdrive. I’ve had a million and one projects lined up patiently waiting for me to finish up construction and painting and Christmas, and I was trying to race through and finish them before the Rookie arrived to demand all of my attention. Of course, he kind of thwarted my plans in about five different ways, but I’m still doing my best to make dents in my plans here and there.

Last summer I was at Urban Outfitters and came across a collection of 10 matching frames in a variety of sizes, just perfect for doing a great grouping (what do you know, they still carry them!). I snapped them up and immediately had plans to fill a wall with them. I imagined filling them with great fabrics or scrapbook papers, something really colorful and graphic. Then I proceeded to set them in a corner of my studio and ignore them for six months. That turned out to be a happy accident, because over those six months I completely changed plans and came up with something I am just wild about.

I decided to use them on a wall in my studio, which made me think of using them as an inspiration wall. I love reading craft blogs and seeing magazine clippings and paint swatches and fabric samples all over the walls as one big gorgeous creative mess, but I’ve never really been successful in using one. Mainly because I don’t seem to have enough hard copies of what inspires me. I usually just use my bookmarks folder as my inspiration wall. But thinking on the topic of inspiration walls got me thinking about a different form of inspiration, so I began collecting quotes that really moved me in a creative direction.

Once I selected all my quotes, I braved my limited Photoshop skills and made jpegs of the quotes all decorated up, then had them printed as photos at Costco.
P1013077

I cut pieces of paper to the sizes of the frames, and taped them up on the wall until I found the magic grouping that made me happy.

P1013078

I just love it. Instead of sewing when I’m sitting at my desk, I find myself staring at it. And every quote is so meaningful to me, it totally kicks my butt in all the best ways.

Here you go. My gift to you. Feel free to download for personal use, but please credit me if you use them online. I hope you find them inspirational.

I am not afraid. I was born to do this. – Joan of Arc.

Share your knowledge. It’s a way to achieve immortality. – Dalai Lama


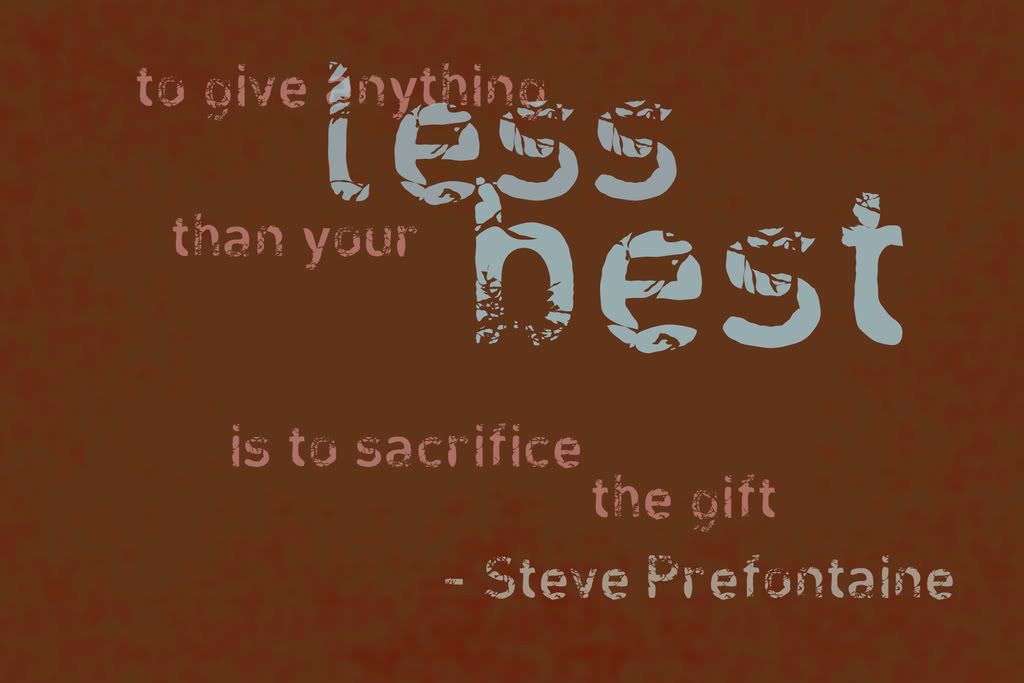
To give anything less than your best is to sacrifice the gift. – Steve Prefontaine

I am not giving you these experiences for yourself. Write them down. – Henry B. Eyring

One hour devoted to the pursuit of beauty and love is worth a full century of glory. – Kahil Gibran

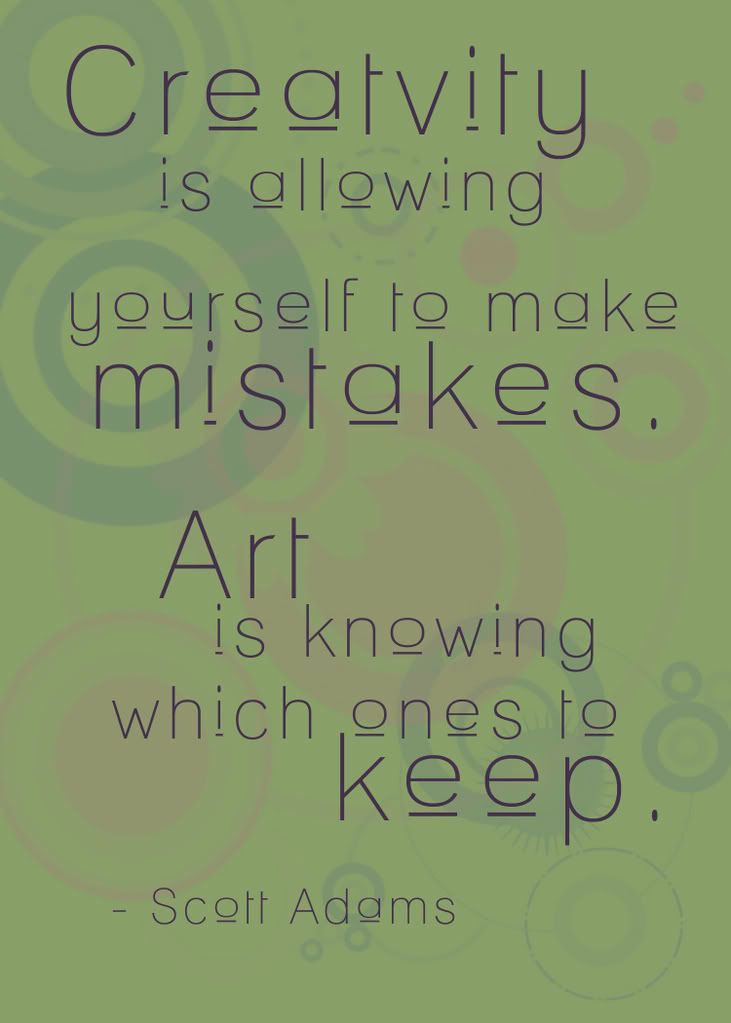
Creativity is allowing yourself to make mistakes. Art is knowing which ones to keep. – Scott Adams

If you want to move the world, you first have to move yourself. – Deiter F. Uchtdorf

Our deepest fear is not that we are inadequate. Our deepest fear is that we are powerful beyond measure. – Marianne Williamson

We don’t have an eternity to realize our dreams, only the time we are here. – Susan Taylor

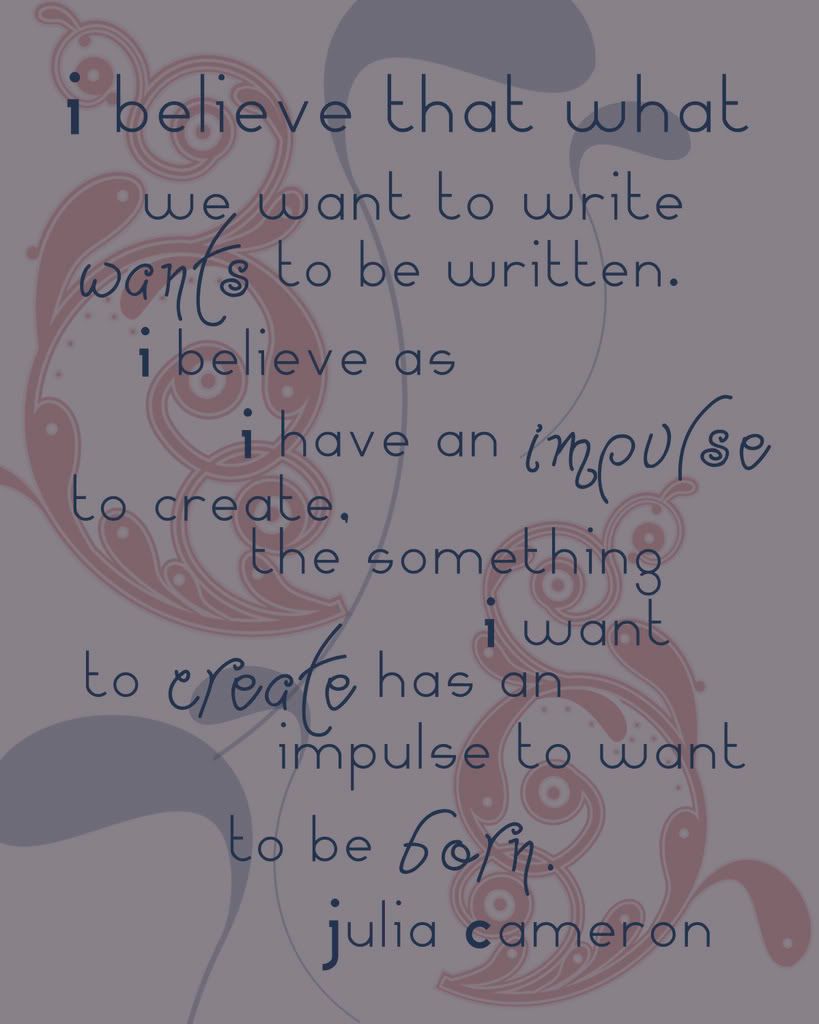
I believe that what we want to write wants to be written. I believe as I have an impulse to create, the something I want to create has an impulse to want to be born. – Julia Cameron

Baby Beanbag

Finally, we’ve reached the end of our patterns for the NICU. This item was my very favorite of all the cool little gadgets and things they had there.

P1013537

The nurses used this little beanbag for everything and Atticus loved the thing. It’s main purpose is to sit on top of the babies feet, with the arms of the beanbag pushing the babies legs into proper position instead of splayed out to the sides. As we’ve discussed, gravity is very hard on these little bodies that still belong in the womb. Their little legs get pushed open which can cause a lot of harm on their hips and knees and lead to further problems as they develop. This beanbag pushes their legs closed just as they’d be if they were still gestating.

They also frequently just drape this over the baby’s whole body. Atticus just LOVED this. It offers just enough pressure to make the babies feel safe and bundled up and cozy without getting in the way too much. Atti got to sleep with the beanbag way before he had matured enough for it to be safe actually bundling him up.

It also serves as an extra set of hands inside the little isolette. I saw it used to prop up his oxygen tubes or set next to his face to hold the pacifier in place. It’s the greatest little thing ever.

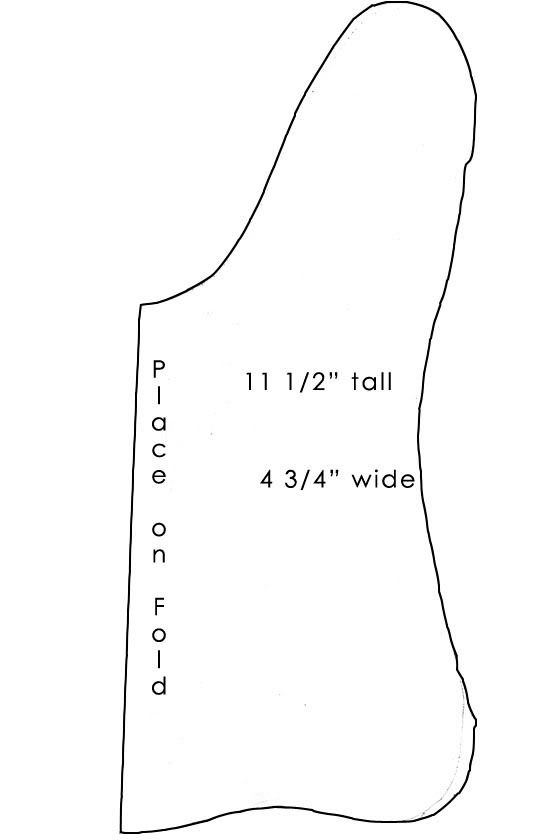
To make the baby beanbag, cut two pieces of the pattern piece. I didn’t include a seam allowance in the pattern because it wouldn’t fit on my paper that way, so I just traced the pattern onto the fabric and then cut about 1/4″ outside the lines. It was also handy being able to just sew right on by traced line when I was going around so many curves. Sew the pieces right sides together leaving a gap between the arms, and turn right side out. These will have to be washed and sterilized constantly, so the best filling to use is the plastic pellets you find in the doll aisle. Each beanbag should be filled about halfway full, which should take about a full bag of pellets. Sew shut thoroughly.

That’s it! If I was unclear about any of these patterns, please email me at tresa at tresaedmunds dot com and I’ll walk you through it.

Baby Clothes for little babies

It’s taken me forever to try to figure out how to post this simple little pattern. Once I scanned it in I had to try to trace it in Photoshop, and that proved to max out my meager computer skills. But I think I’ve finally managed to get it done. I think. Click the links below to find out if I accomplished it.

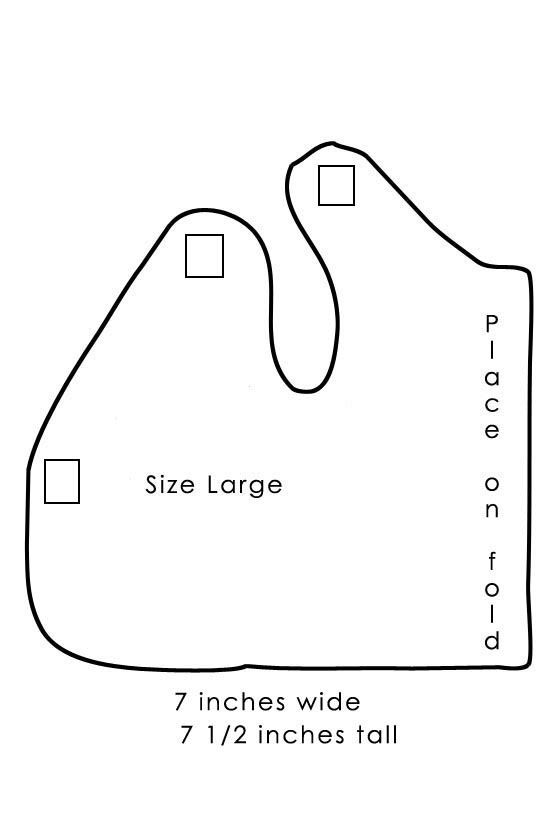
Large Vest

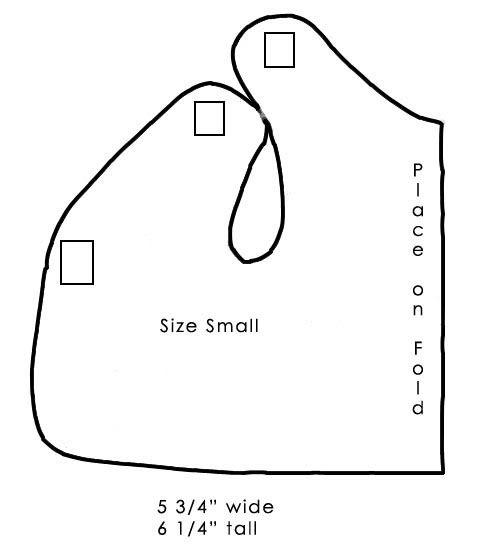
Small Vest

These vests are used for NICU babies who are attached to too many wires to wear regular baby clothes. If a baby has an IV, they can’t get their little arms into sleeves. If they have a shunt or other head issues, they can’t get their little bean through a neck. And if anything starts to go wrong, you can’t get a baby out of those clothes fast enough to save them.

Experts agree that babies should wear a little something. These vests won’t keep them warm on their own, but every little bit helps. It’s much more for the comfort of the parents and a reminder for the staff. This covers up a lot of the wires and scary parts and makes the baby look more like a little baby. Books I read said that these helped his caregivers to treat the babies like little humans instead of a series of tasks to be performed, and encourage the parents to bond with their babies which can be difficult to do when looking at a red wrinkly thing covered in wires and encased in a plastic box.

Construction is incredibly simple. Cut two of the pattern pieces, on a fold. Unfold both pieces and line them up right sides together. Stitch the pieces together with a 1/4″ seam allowance, leaving a small gap at the bottom and turn right side out. Iron the piece flat, and then topstitch the piece as close the the edge as you can. Finish by stitching squares of velcro where indicated on the pattern so that you create an arm and a vest closure.

P1013533
Notice how the velcro is attached? One side of it is attached to the front fabric, and the other side is attached to the back fabric. You don’t want to figure that one out the hard way.

More NICU needs

I’ve already been getting so much great stuff sent my way. I’m so touched by what you all continue to do. I’ve been taking pictures and I’ll show them off once I finally finish putting up the patterns in the first place.

So now that we’ve covered the outside of the isolette, let’s address what these little guys need on the inside.

For starters, there’s their bedding.
P1013297

Babies, as I’m sure you’re aware, are both snuggly little things as well as spontaneous poop factories. This bedding serves dual purposes of giving the babies a nice soft little place to lay down, while also being incredibly easy to remove so the isolette can remain sterile even after the poop starts to fly.

They couldn’t be simpler to make. Fleece fabric works best for this since it’s snuggly and a little spongy, so it’s like a blanket and mattress in one. Then it should be cut so that it will measure 24″ x 20″ after a simple hem.

Underneath their little bedding is usually what they call a “snake.”
P1013298

This is basically just a stuffed tube that they place in a U shape to make a nice cozy little nest for the babies. During their time in the NICU, it’s all about making the babies feel as close to the womb as humanly possible. This little snake shrinks the big plastic box down to whatever size that particular baby needs, and forces the baby to squish up instead of sprawl out. This is better for their joints, their future development, but especially for their stress level. It’s scary for a baby who is used to the fetal position to suddenly be forced into a starfish position because they’re too little to fight against gravity.

The snake can be made out of any easy care fabric. Flannel and cotton work best. To make them you need a piece of fabric measuring 6 1/2″ by either 30″ or 36″. Sew this fabric into a tube, and then close the ends. I cut a circle that roughly measured the diameter of the tube and sewed that on, but you could easily just sew them shut without adding the extra work.

Then stuff them with polyfil. The right consistency is important in the stuffing. You don’t want them so squishy they don’t offer the support babies need, but you don’t want them overstuffed so they can’t hold their U shape. Somewhere in the middle is just right.

Next up: baby clothes!

The Great, Long-Awaited NICU Drive!

P1013295
My cousin Karen took this photo for me and I just couldn’t be more crazy about it.

Like all things in my life, I start out with the very best of intentions and get completely sidetracked by reality. A month and a half ago I found out that my NICU had a need and I knew I could count on the mighty forces of the internet to save the day. And then my life crashed down around me and I went into my cozy little cave and ignored all the rest of the world. I’m starting to get back on my feet now, so I have to follow through on this.

Babies in the NICU (or Special Care Nursery as they call it in my hospital – probably because it sounds nicer. They’re not in need of “intensive” care….oh no, just special care. That’s much less scary.) have a lot of special needs. And because most babies are born when they’re supposed to be, there isn’t a huge marketplace out there providing all the special things these tiny babies need. Preemie clothes are rare out there, and they don’t take into account the fact that a lot of these babies have tubes and wires and have to be incredibly easy to remove should an emergency arise. The environment of the NICU is harsh and loud and the polar opposite of the nice dark cozy womb the babies are still supposed to be in, so the babies need things to try to recreate that environment as closely as possible.
Almost all NICU’s rely on donations for these items. Medical costs are high enough, particularly on top of the high costs of everything else a baby needs, so if donations aren’t forthcoming, the babies have to do without. The hospital won’t buy these things, even if they’re available. They just make do. At my hospital this means that the angel nurses, who all have their own families they’re caring for on top of my boy, go home and with their own money and time, make all the items the babies need.

Meanwhile, us poor moms are frantic nervous wrecks feeling frustrated and impotent and completely alone in the world. Suddenly there are healthy, happy babies everywhere you look and all you can focus on are how empty your arms feel. Any support you receive is so treasured you just want to kiss everyone who so much as pats you on the shoulder. When you see a little tag on a blanket that reads, “Donated with love from the sisters at the Church of the Living Christ” you feel buoyed up by the loving hands that made the blanket that cradles your baby, especially when you can’t.

Over the next little while I’ll be sharing items that the NICU needs. It may take me a while before I get all the items up because I have to draft a few patterns, and while it couldn’t be simpler in the flesh, turning them into a digital format is a little complicated for my weak photoshop skills.

The first item is what the NICU needs the absolute most. Miniature quilts.
P1013311
These little quilts are good for everything in the NICU. They serve first and foremost as isolette covers. As I mentioned, the NICU is a very hard environment. There are bright florescent lights on all day and all night, so not only is there no regular day/night cycle, but these poor babies go from a place of total darkness where they are safe and protected, to a lifesaving but still harsh plastic box that – by necessity – leaves them vulnerable to all the stimulus in the chaotic room.

The blankets are also used to keep the babies warm in the moments when they are allowed to be held, a cozy cover when the mothers get to work on breastfeeding, and they go home with the baby as a memento of what they accomplished there.

Studies have shown that preemies are at much higher risk for learning disabilities, ADD and ADHD, and the commonly accepted reason for this is due to all the stimulation they can receive in the NICU. A baby who spends a great deal of time there experiences so much more stimulation through all the lights and sounds and interaction with the nurses, that many doctors feel their brains retain more pathways for communication, which can lead to trouble processing information later on. These simple little blankets help to shield the babies from all the activity around them, keeping their little isolette as dark and quiet as possible while still allowing the nurses to keep a watchful eye on them.

These blankets can be any style you dream up. They should be thick enough to dim the light, so handknits are not a great option here. It is helpful to have one side that is a solid color because some babies – such as babies born addicted to drugs – are extremely sensitive even to the visual stimulation in a bright bold pattern. They should measure roughly two feet by three feet, but that is not an exact measurement by any means. They can easily be bigger since blankets do fold easily, but they shouldn’t be very much smaller. Since they will be going home with the babies, snuggly fabrics are a plus, but not a necessity. They can be an elaborate hand pieced quilt, or a simple little blanket. The blanket Atti received was a snuggly microfiber on one side, a bright Care Bear themed cotton on the other, sewn together like a pillow with a simple topstitching around the outside. No batting, no further quilting. And it works great.

If you are interested in donating to our cause, you can mail any completed blankets to:

Removed until I get a new P.O. Box.
Email me for info! tresa at reesedixon dot com

(this address may be subject to change, but I’ll be sure and warn you)

If you don’t have time to make a blanket but still want to contribute, I’ll happily take any stash you have off your hands and put my teenage girls from church to work. Fabric, batting, thread, anything you want to get rid of that could work for baby blankets.

Oh, and if anyone can come up with a clever name for this, I’d love to hear it. Right now my brain can’t come up with much more than, “Is my baby coming home? When is my baby coming home? Can my baby come home today? How about tomorrow?” And that isn’t very good at describing what we’re trying to do here.

Here’s me when I got my first good snuggle while they changed out his tubes. Apparently, pure unabashed joy makes me turn into an anime character.
P1013280